this tutorial created by James Hewett in photoshoptutorials.ws, i like it most so published it here, hope you all like it...
Preview of Final Results
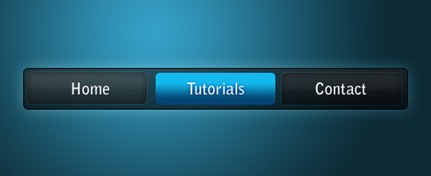
Blue on Black Navigation Bar Photoshop Tutorial
Step 1
Firstly, create a new document - the size I've used is 540 by 220 pixels. Now for the background I've filled it with a black colour. To do this go Edit > Fill with the colour #0d0d0d.
Step 2
Secondly, we'll be making the background for the navigation buttons to go inside. Create a new layer (Layer > New > Layer) and select the rounded rectangle tool. Make fixed size selection of 480 by 50 pixels with a radius of 5 pixels in the middle of the document.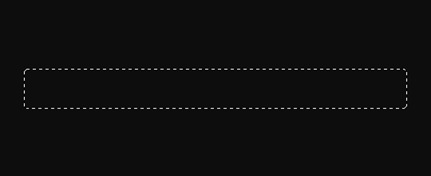

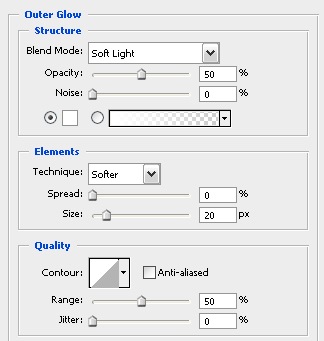
Step 3
Now we'll be adding a couple of layer styles to this navigation background.Layer > Layer Style > Outer Glow


Step 4
Next up we'll be adding in the buttons. Create a new layer and using the rounded rectangle tool again make a selection of 150 by 40 pixels (with a radius of 5 pixels again) on the left side of the navigation bar.

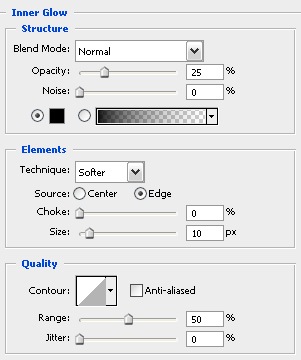
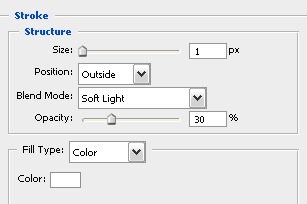
Step 5
I've applied three layer styles to this button to give it some depth and make it look cooler.Layer > Layer Styles > Inner Glow

Step 6
Select the text tool and add in some text - the font styles that I have used for the text are Bell Gothic Std, Bold, 20 pt, Crisp, #ffffff.
Step 7
Now repeat the button steps so you have two new buttons - I've decided that I'd make the middle one a different colour to stand out (this can be like a mouse over effect or something if you decided to code this navigation bar for a web layout). The blue colours I used for that are #14b9ef and #054573.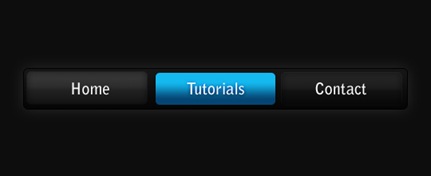
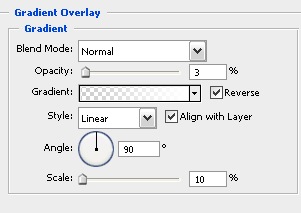
Step 8
Because we have set the fill of the layers to 50-60% we can adjust the background and it can be half see through - below I've put a radial gradient with colours used in the vista theme.
No comments:
Post a Comment