this photoshop tutorial created by Mohammad Jeprie on psd.tutsplus.com and i liked his easy and simplicity so i shared here...
Step 1
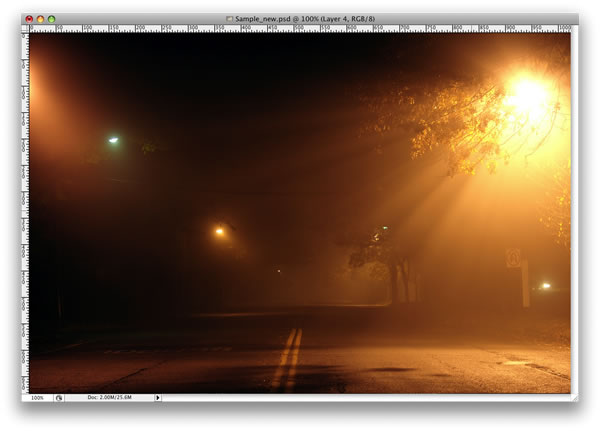
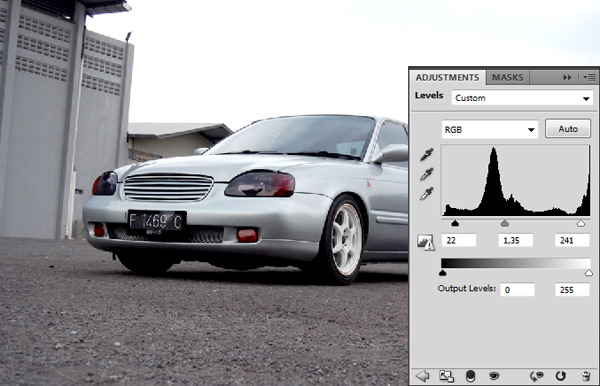
Open background image in Photoshop. Let’s add more contrast onto the background by adding Adjustment Layers. Click Add Adjustment Layers icon and select Levels. Drag black and white slider to the center until image contrast is increasing.
Step 2
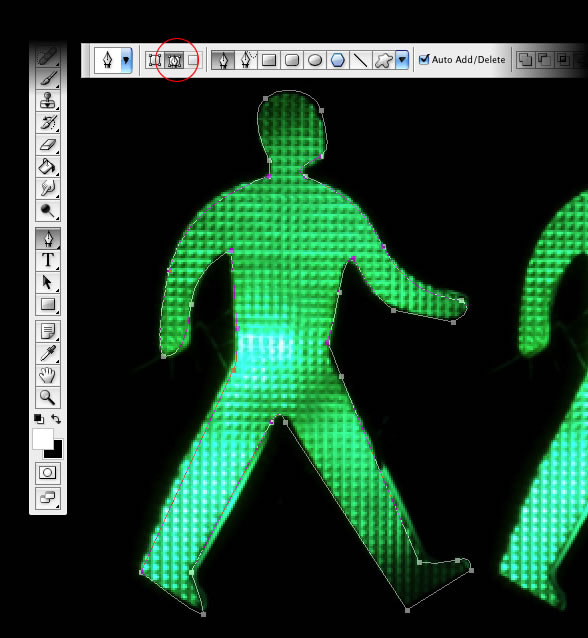
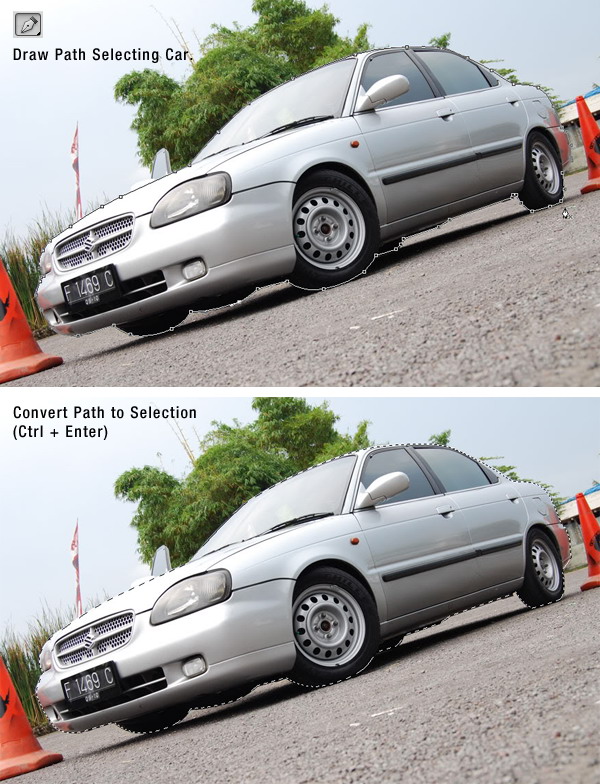
Open car stock and create new path in Paths panel. Activate pen tool and draw path selecting the car. Convert path into selection by pressing Command/Ctrl + Enter.
Step 3
Activate move tool and then drag car into background file.
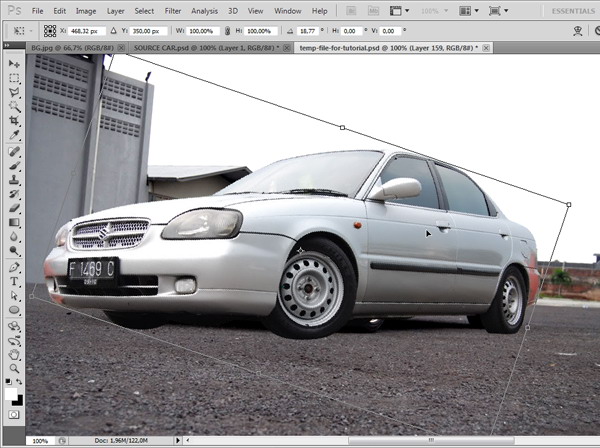
Step 4
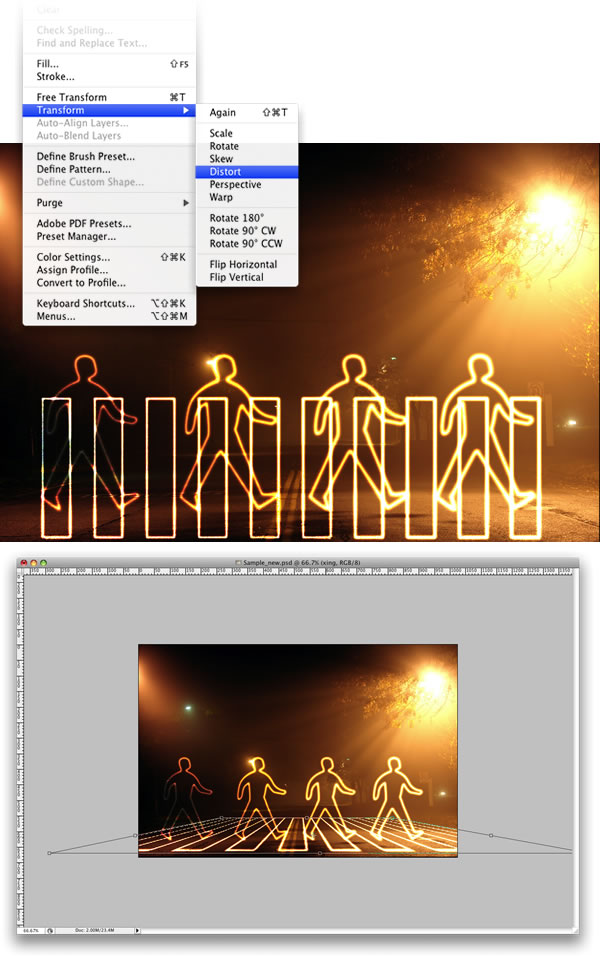
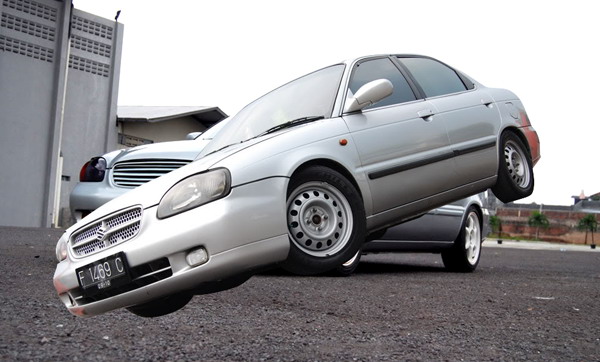
Hit Command/Ctrl + T to perform transformation. Rotate car until it covers the original car.
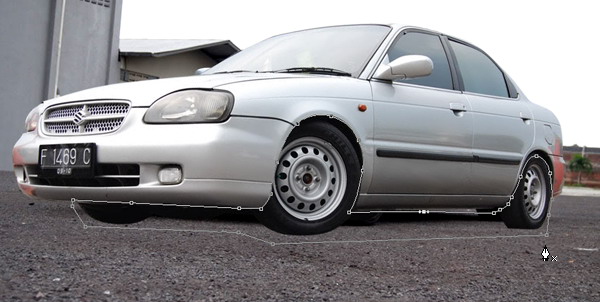
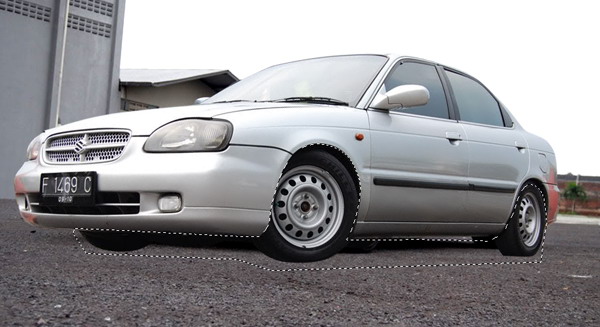
Step 5
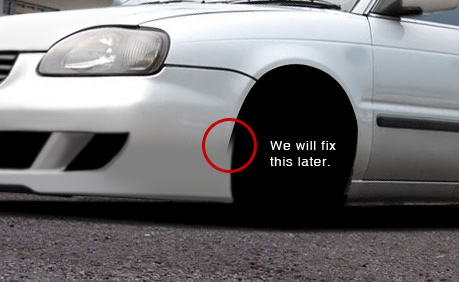
In Paths panel, create new path. Use pen tool to draw a path selecting lower part of the car. Hit Command/Ctrl + Enter to convert path into selection and then delete selected areas.
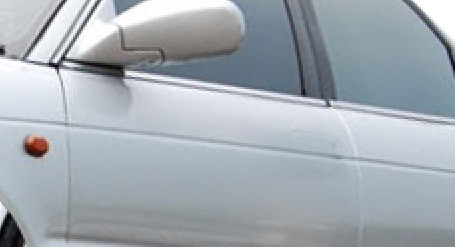
Step 6: Removing Door Handle
This car door is going to use remote. So, let’s remove door handle. Select areas next to the door handle using Polygon tool. Hit Command/Ctrl + J to duplicate it to new layer. Place the duplicated layer on top of the door handle. Add layer mask and paint its edges with black until it blends with its surrounding.
Usually, once is just not enough. You will have to repeat this a few times until it really blends and the door’s handle is completely disappeared.
Step 7
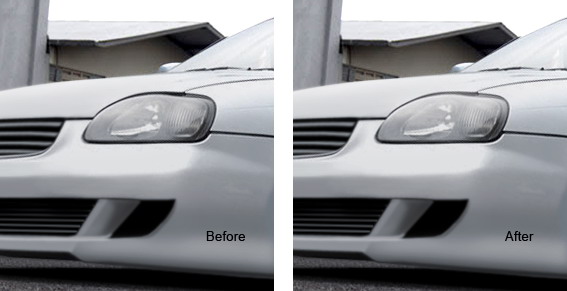
Repeat previous step to remove rear door handle, gas cap, and turn light.
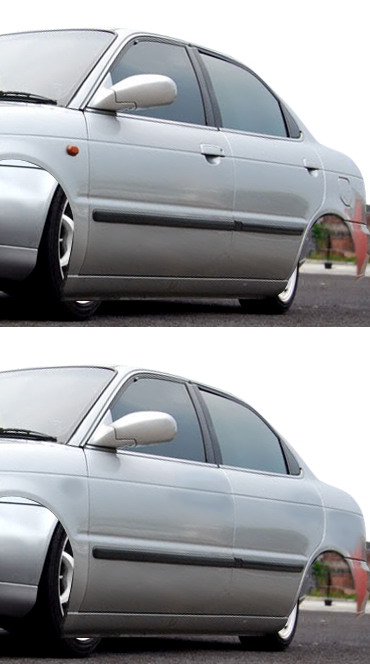
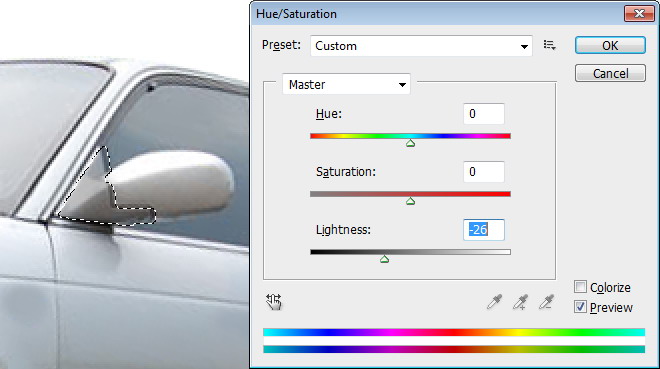
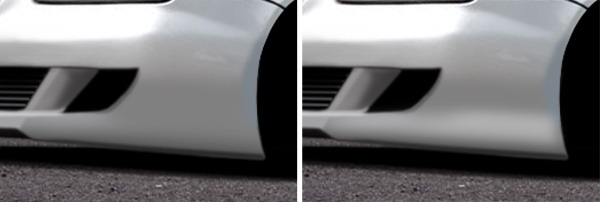
Step 8: Modify Side Mirror
Select lower part of side mirror. Click Image > Adjustments > Hue/Saturation. Reduce Lightness setting to make it darker.
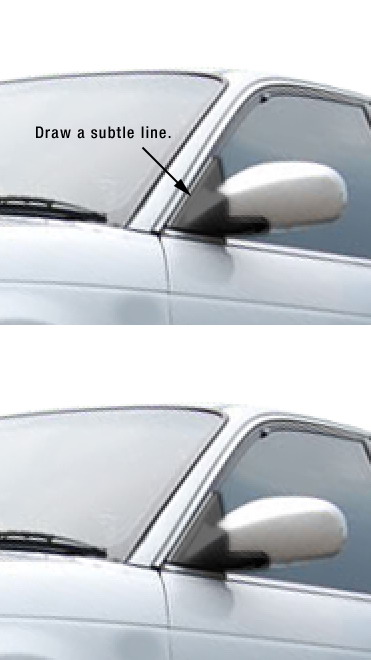
Step 9
Editing lightness sometimes will decrease contrast. This happens to our side mirror. Activate brush tool and set its brush size to 1 px. Draw a black line on indicated area below.
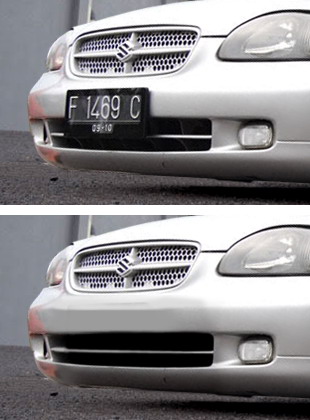
Step 10: Remove Number Plate
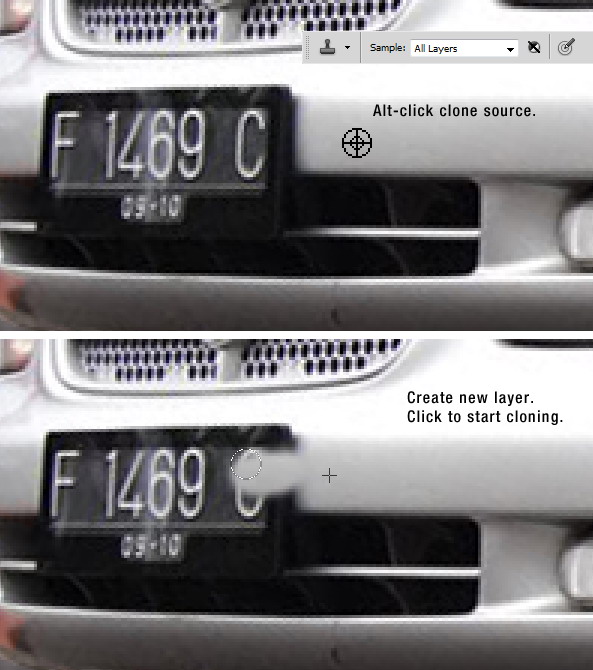
We are going to add custom front bumper. First, we need to remove the car number plate. Activate Clone tool. In the Option Bar, select Sample: All Layers. With this setting, cloning process will be applied on separate layers. Therefore, the original image is unaffected.
Alt-click areas next to the plate number to sample it as clone source. Create new layer and click on the plate number to cover it using pixel from the source clone. To get natural result, I suggest you to use several source clone and reduce Clone tool Opacity from the Option Bar.
Step 11
There is other method you can use to remove the plate number. Activate brush tool. Alt-click similar color to select it and then paint over the areas. This method is relatively faster than cloning, but you must be very careful in selecting the color. Keep in mind that there are no solid color in real life.
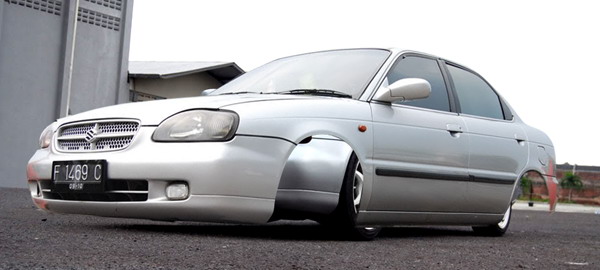
Step 12: Front Bumper
After successfully removing plate number. It’s time to add custom bumper. Use brush tool to paint black on the bumper areas. Set foreground color to dark gray and then draw basic shape inside the bumper. Create new layer and convert it to Clipping Mask. This way, everything we paint will goes inside the shape. Use brush tool to manually draw highlights and shadow.
Step 13
In animation below, you can see the full process of drawing the front bumper.
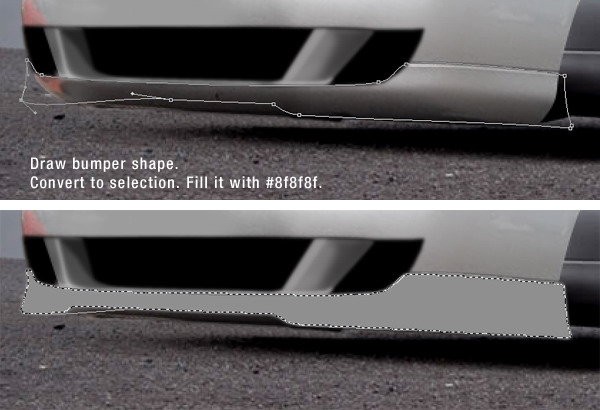
Step 14
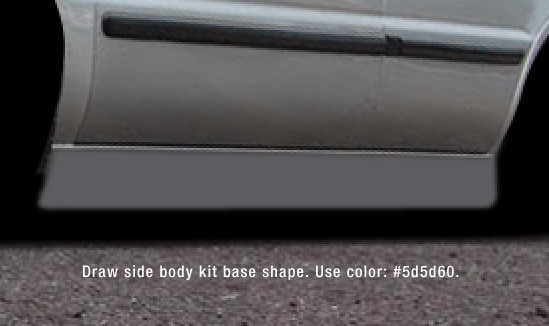
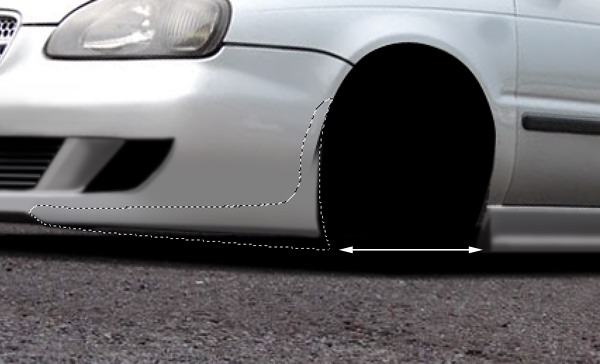
Let’s add lowering kit by lengthening its front bumper. Draw the basic shape using pen tool. Convert it to selection and then fill it with #8f8f8f.
Step 15
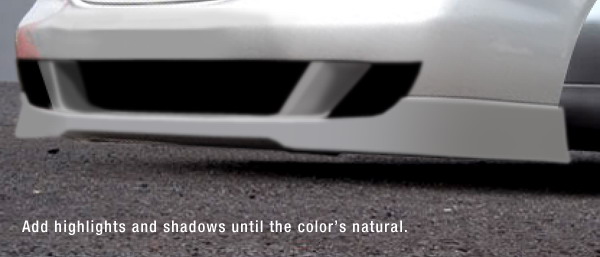
Create new layer. Convert it to Clipping Mask by pressing Command/Ctrl + Alt + G. Use brush tool with low Opacity to paint white for highlight and black for shadow. Repeat this process carefully until we get natural lighting on the front bumper.
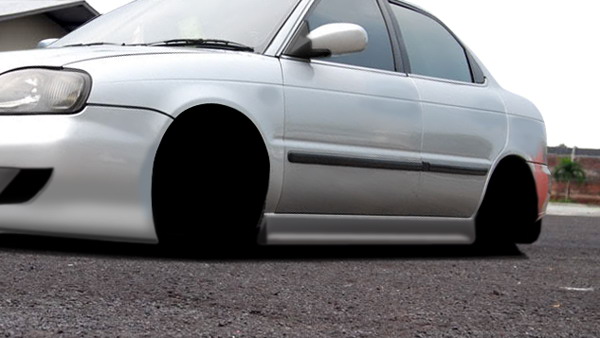
Step 16: Hide Original Car
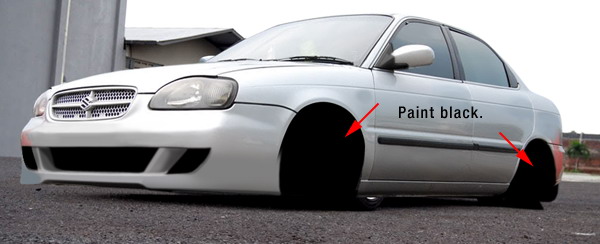
Create new layer under the car’s body. Paint black to cover the original car behind it.
Step 17: Intercooler
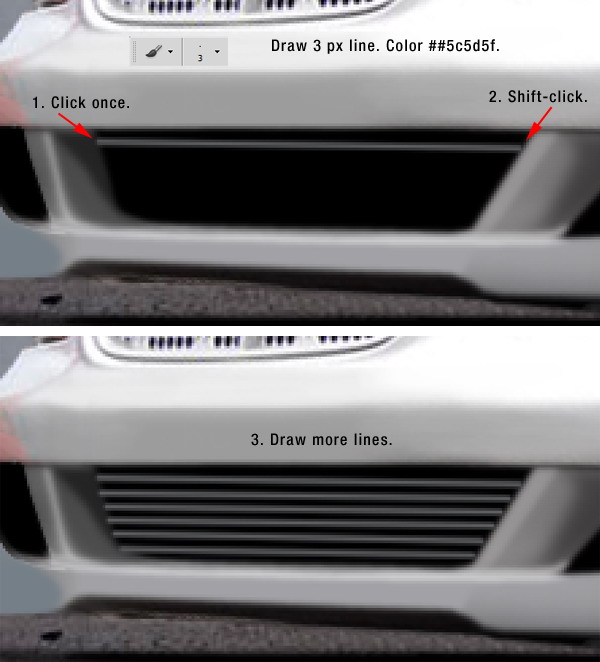
Next step is adding intercooler. Set foreground color to #5c5d5f. Activate brush tool with brush size 3 px. Draw a line by clicking once and Shift-click on other end of the line. Repeat this until we have some lines.
Step 18
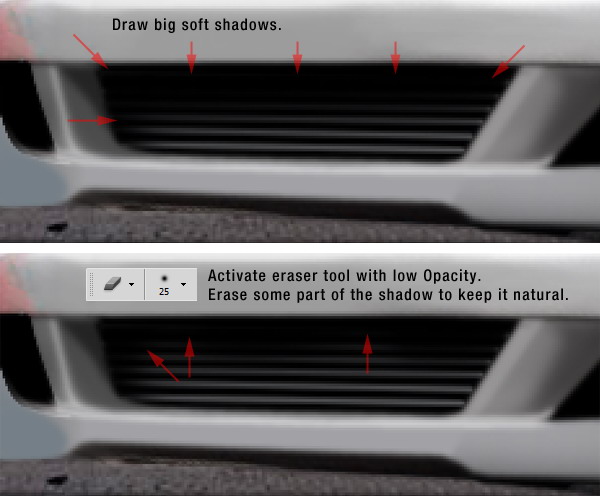
Set foreground color to black. Draw big shadow covering the lines. Activate eraser tool with low Opacity. Erase some of the shadow until it looks natural.
Step 19
You may notice that there is a missing detail on its bumper. Let’s leave it that way for now. First, we need to work on its side skirts.
Step 20
Activate brush tool and set foreground color to #5d5d60. Draw side skirt.
Step 21
Create new layer. Hit Command/Ctrl + Alt + G to convert it to Clipping Mask. From now on, everything we paint will goes inside the side skirt. Paint white for highlight and black for shadow. Below you can see the progress in painting its shadow and highlight.
Step 22
After drawing side skirt, we can see that our front bumper is not low enough. Let’s fix it by redraw the front bumper. Create new layer and convert it to Clipping Mask. Use brush tool to add some shadows and highlights.
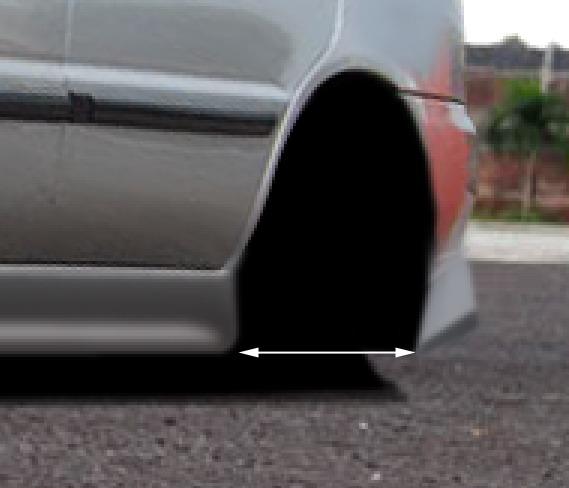
Step 23: Rear Bumper
Use same technique to draw rear bumper.
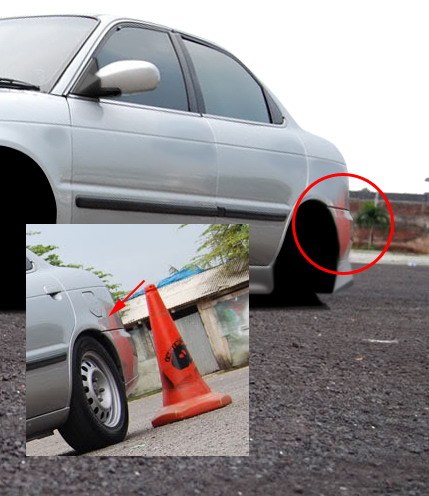
Step 24
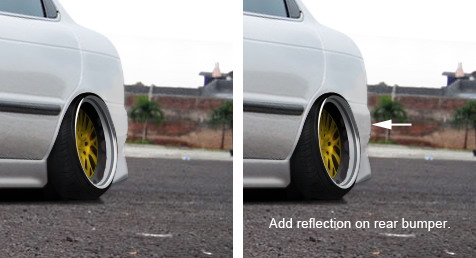
You can also notice that there is a red reflection on rear bumper. This reflection comes from traffic cone in the original photo.
Step 25
Use brush tool to draw thicker bumper. Make sure to sample color from other part of the car. We have cover this technique in Step 11.
Step 26: Air Scoop
Use brush tool to draw an air scoop. Make sure to add subtle highlight make it realistic.
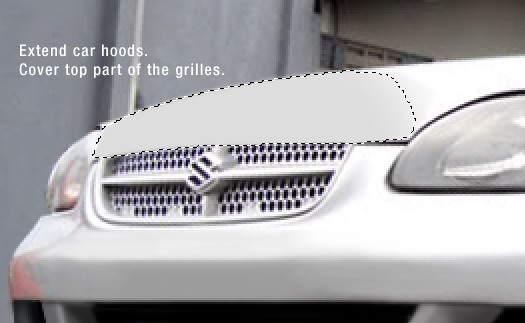
Step 27: Car Hood
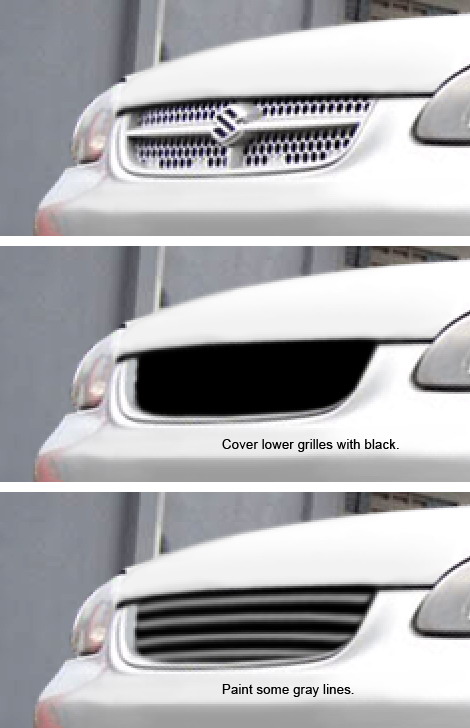
Select car hood and cover top part of the grilles. Sample similar color from other part of hood to make sure the result blends naturally.
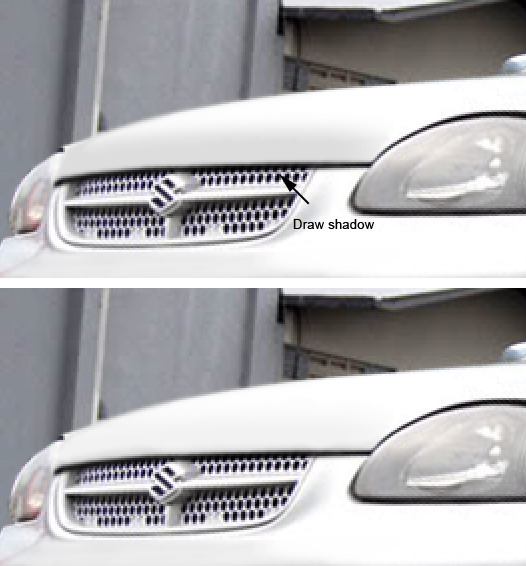
Step 28
Paint shadow under the hood.
Step 29
Crete new layer and cover the rest of the grilles with black. Use brush tool to draw some gray lines
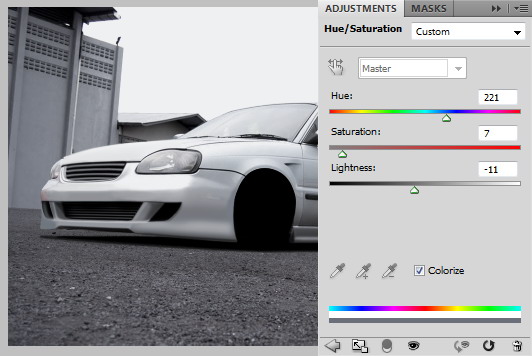
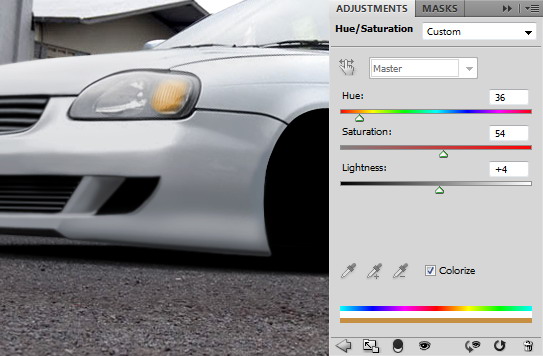
Step 30: Darkening Front Part of the Car
Currently front part of the car is too light. To fix this, add Adjustment Layer Hue/Saturation with below setting.
Step 31
Fill layer mask with black. Activate brush tool and set its hardness to 0%. Paint front part of the car with white. This way, the adjustment layer affects only front part of the car.
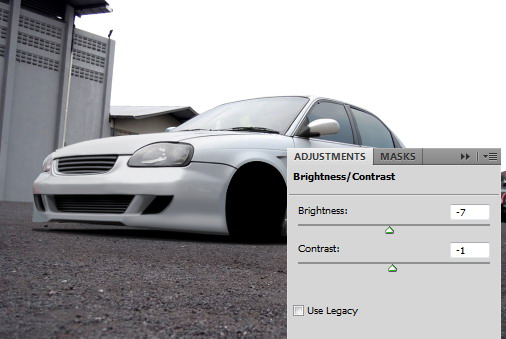
Step 32
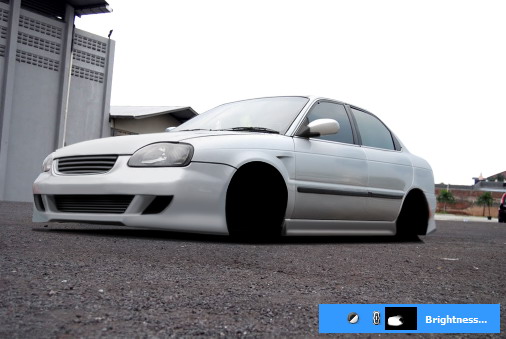
Add Adjustment Layer Brightness/Contrast.
Step 33
Again, fill layer mask with black. Paint front part of the car with white.
Step 34
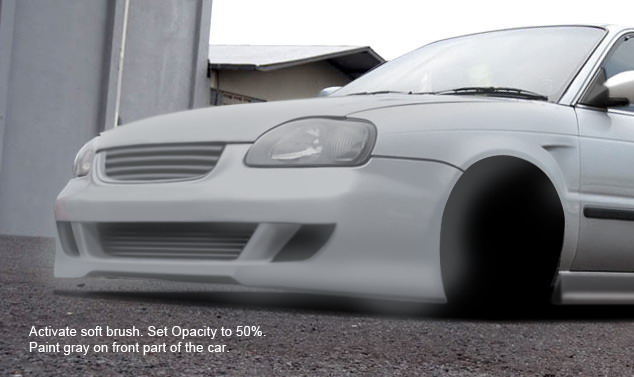
Activate brush tool. Set its Opacity to 50%. Paint gray on front part of the car.
Step 35
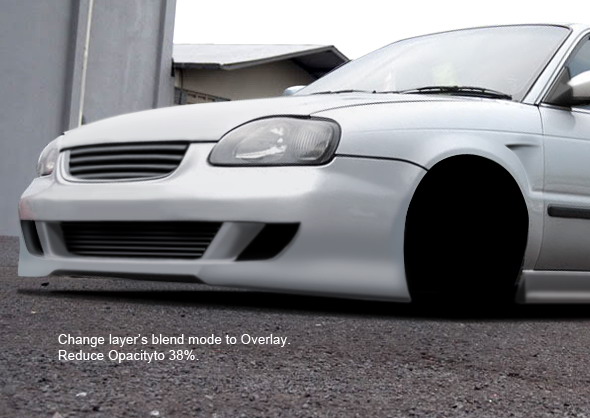
Change layer’s blend mode to Overlay. Reduce its Opacity to 38%.
Step 36
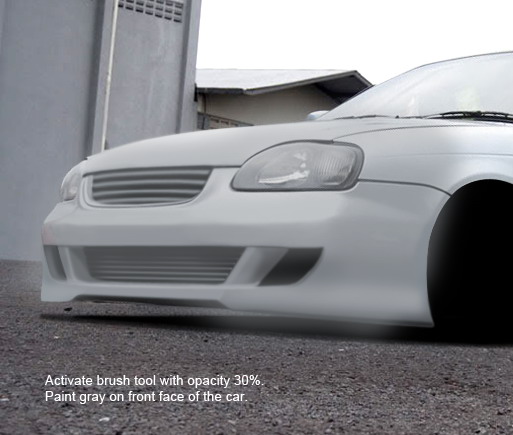
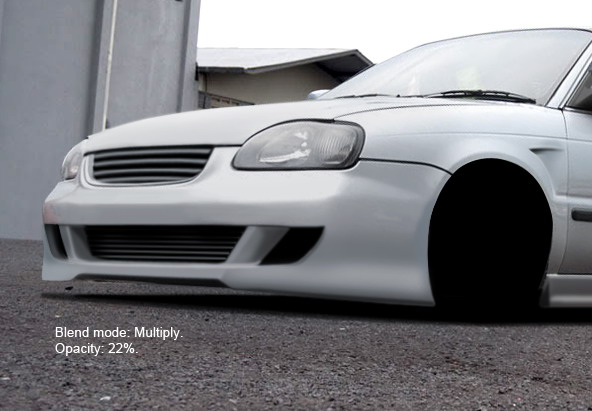
Its front part is still too light. Create new layer again. Paint another gray on top of front part of the car. Change its blend mode to Multiply and reduce its Opacity to 22%.
Step 37: Head Light
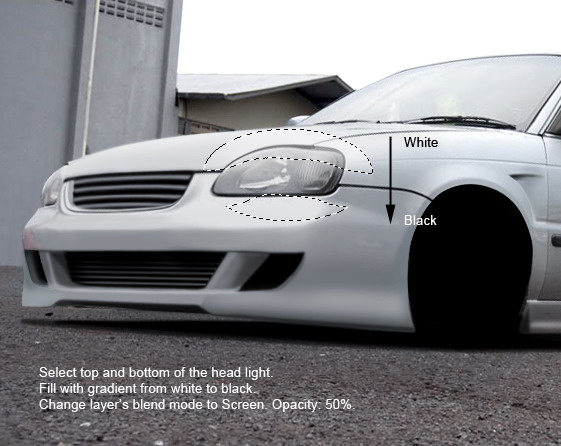
Select bottom and top part of the head light. Fill it with gradient from white to black. Change layer’s blend mode to Screen. Set its Opacity to 50%.
Step 38
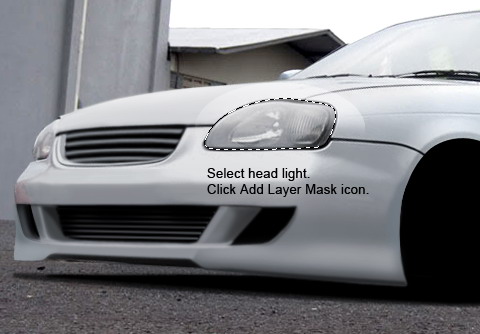
Select headlight. Click Add Layer Mask icon. This way, the gradient goes inside the head light. Below, you can the subtle difference before and after adding highlight.
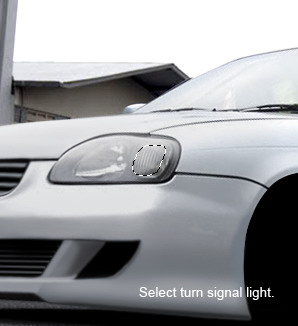
Step 39
Select turn signal light. Add Adjustment Layer Hue/Saturation. Increase Lightness and Saturation slider.
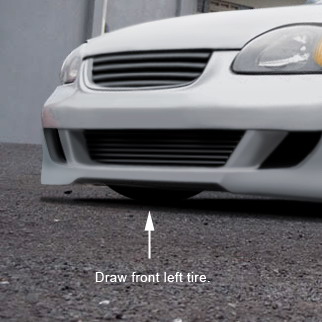
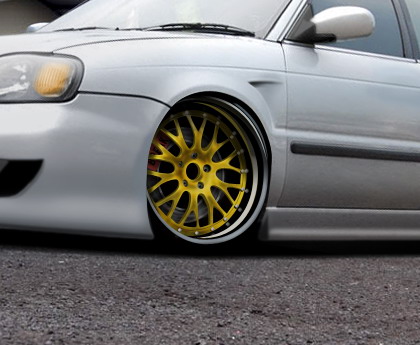
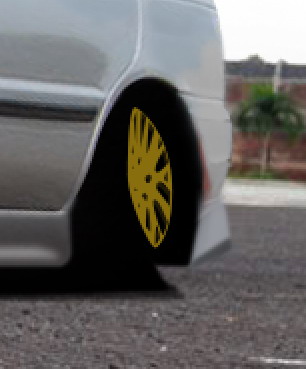
Step 40: Front Tire
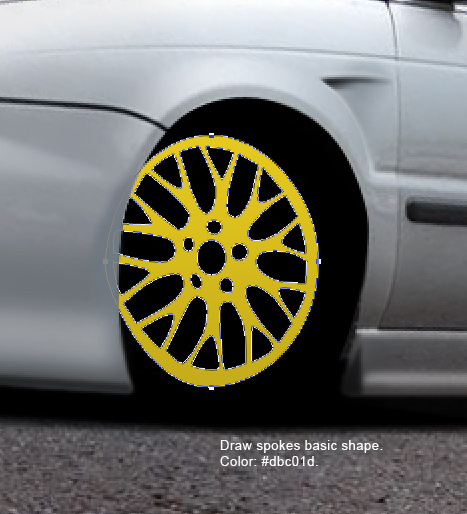
Activate brush tool and set foreground color to black. Draw front left tire.
Step 41: Draw Custom Rim
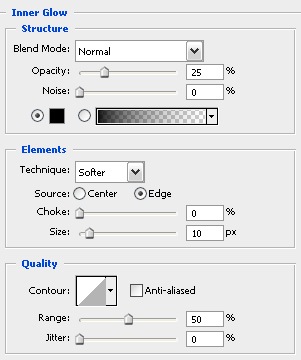
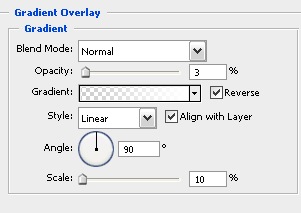
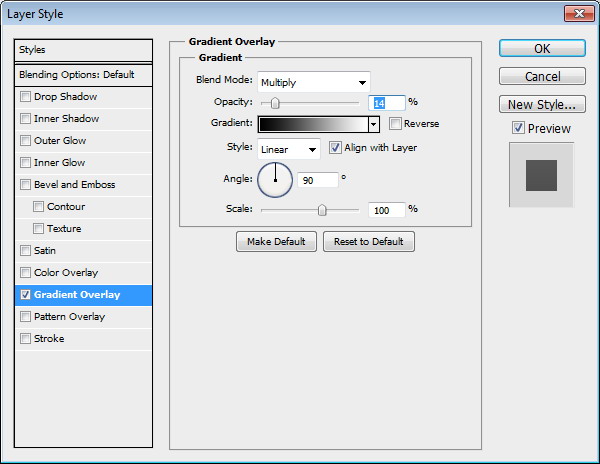
Use pen tool and custom shape tool to draw spokes basic shape. For its color use #dbc01d. Add subtle Gradient Overlay from black to white. For more information on drawing rims for a car. Check out this
tutorial.
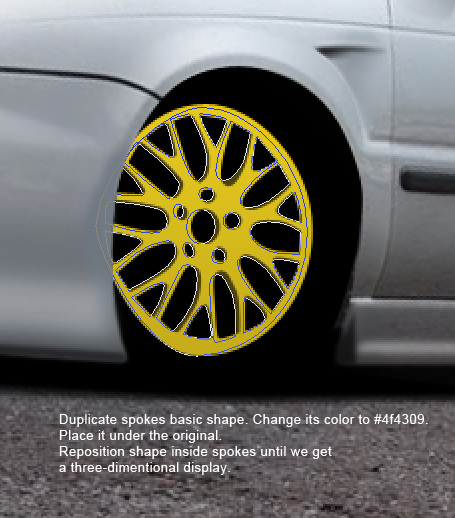
Step 42
Duplicate spokes basic shape we have just created by pressing Command/Ctrl + J. Change its color to #4f4309. Place it under the original spokes. Reposition shape inside the rim until we get get a three-dimensional display.
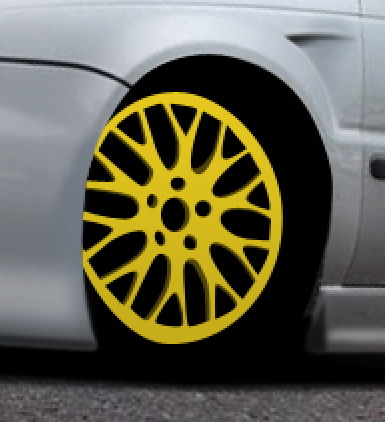
Step 43
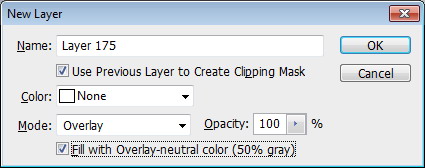
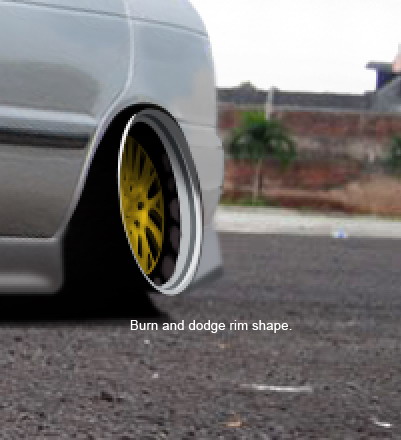
Alt-click new layer icon in Layers Panel. Activate Use Previous Layer, set blend mode to Overlay, and check Fill with Overlay-neutral color.
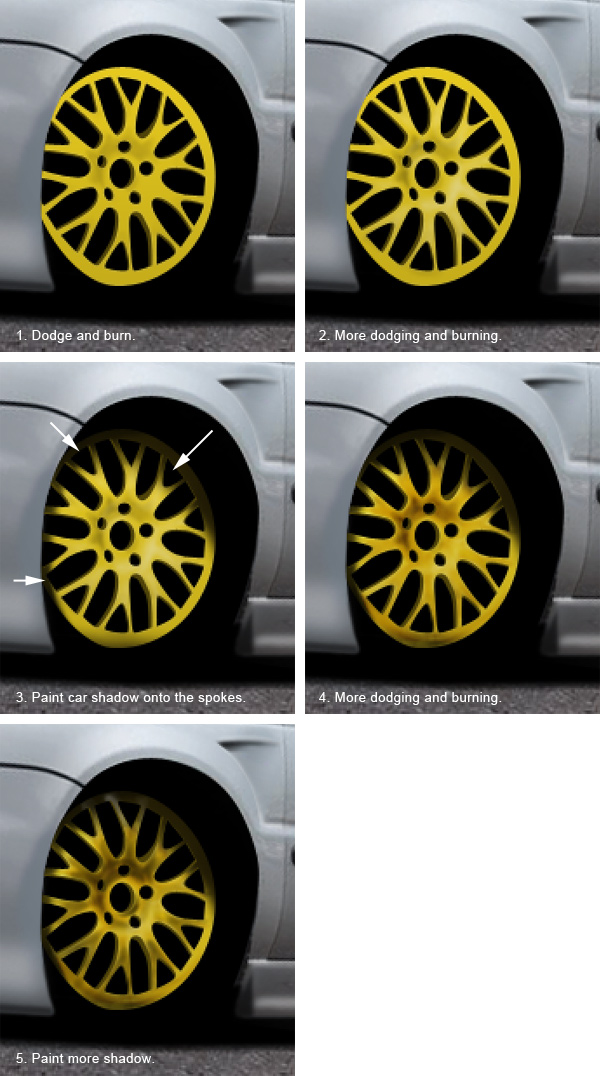
Activate dodge tool and paint on the new layer to lighten the spokes shape. Hold Alt to temporarily switch to burn tool and darken the spokes shape. Create new layer and then draw some shadows on the spokes. See picture below for reference on the painting process.
Step 44
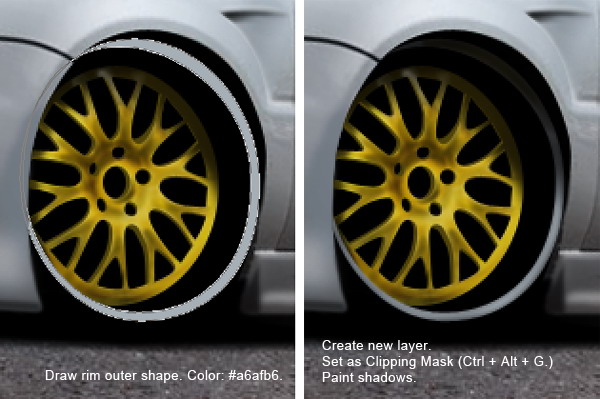
Draw outer metal shape of the rim with color: #a6afb6. Create new layer and set it as Clipping Mask. Paint shadows on top of the shape.
Step 45
Draw rim highlight on upper right of the previous shape.
Step 46
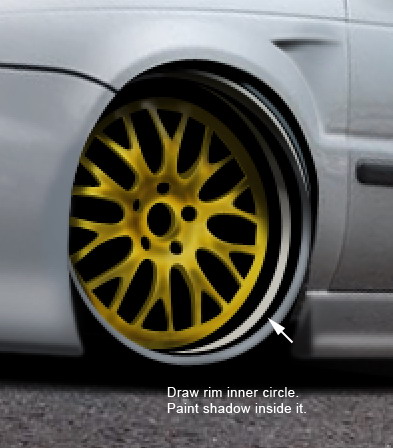
Draw rim inner circle and paint some shadows inside it.
Step 47
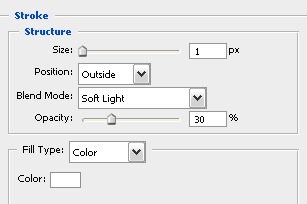
Draw circular selection on the rim. Create new layer. Click Edit > Stroke. Select Width: 1 px with black color. Reduce its opacity.
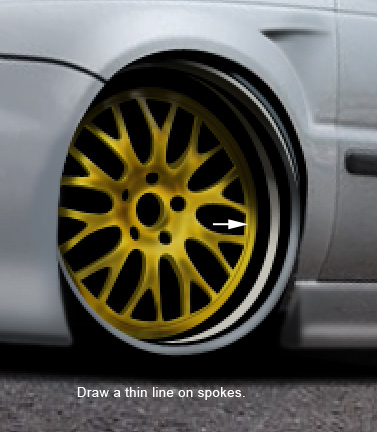
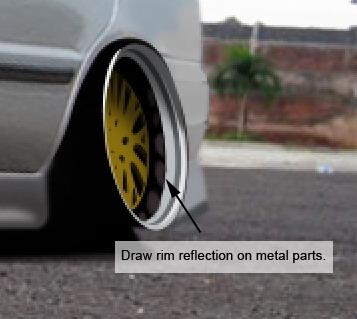
Step 48
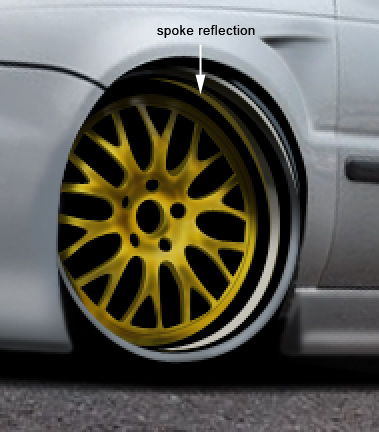
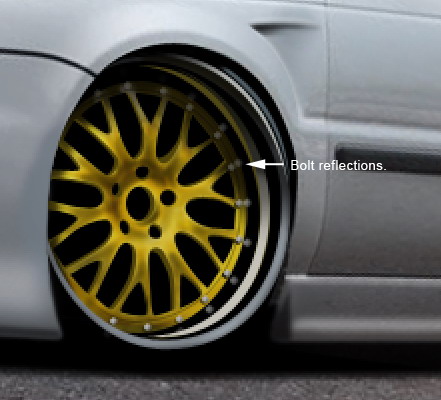
Draw spokes reflection on the rim.
Step 49
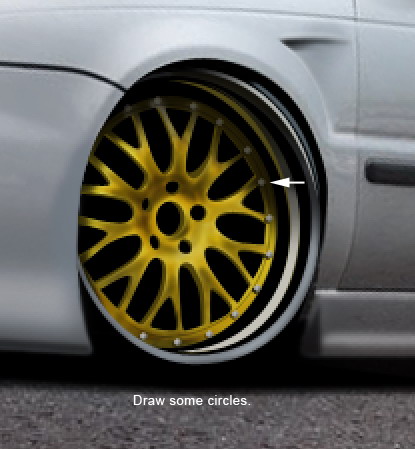
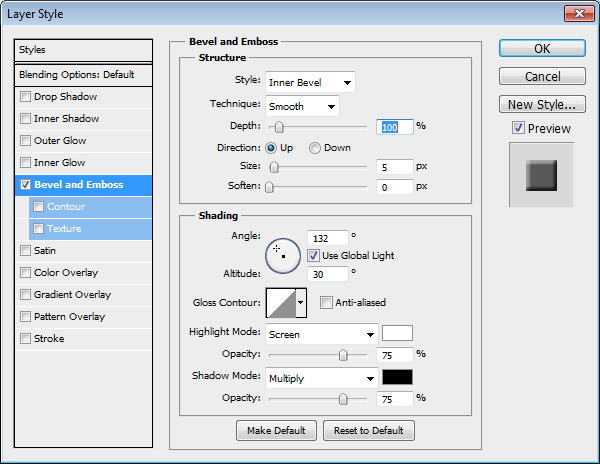
Draw some circle on the spokes. Add Bevel and Emboss to give a three-dimensional display.
Step 50
Use brush tool to draw circles reflection on the rim.
Step 51
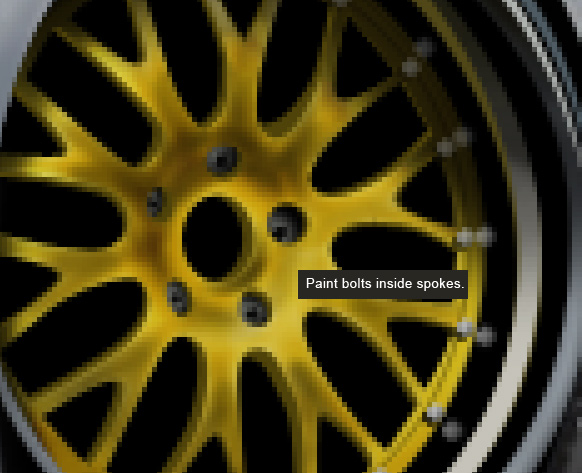
Make new layer under the spokes. Draw some bolts in the center of the spokes.
Step 52
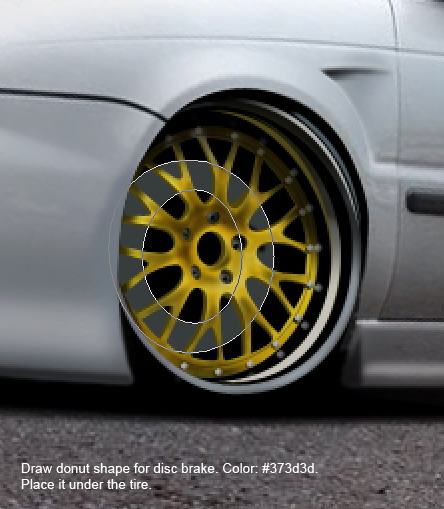
Draw donut shape for disc brake. Set its color to #373d3d. Place it behind the tire.
Step 53
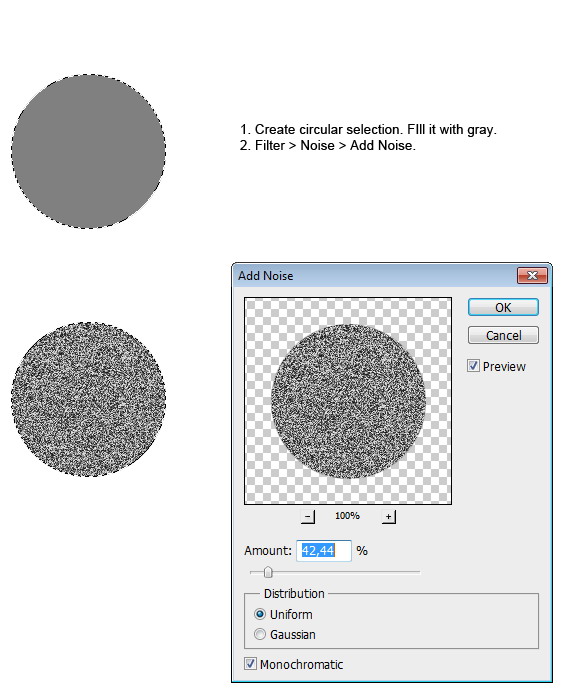
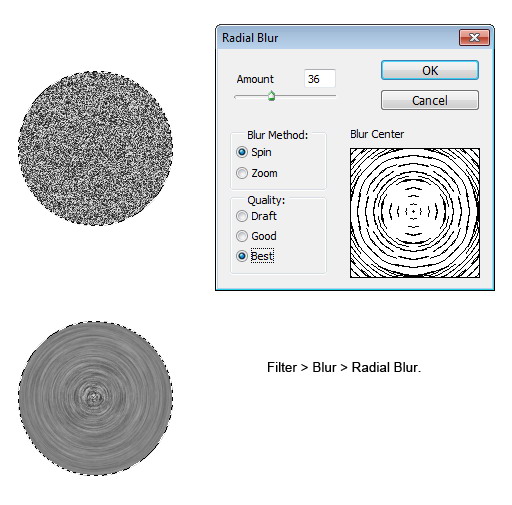
We are going to add some textures on the disc brake. Create new layer and draw a circular selection. Fill it with gray. Click Filter > Noise > Add Noise.
Step 54
Withour removing selecton, click Filter > Blur > Radial Blur. Set Blur Method to Spin and Quality to Best.
Step 55
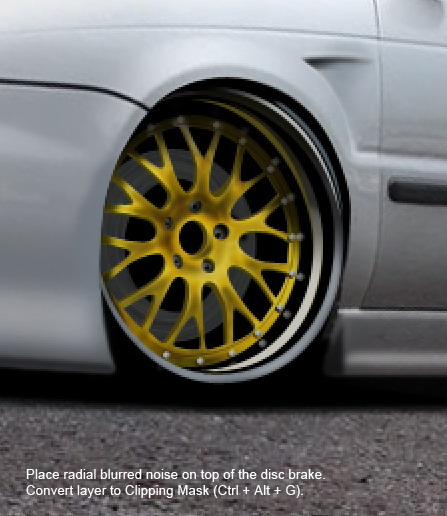
Place the noise on top of the disc brake. Hit Command/Ctrl + Alt + G to place it inside the disc brake layer.
Step 56
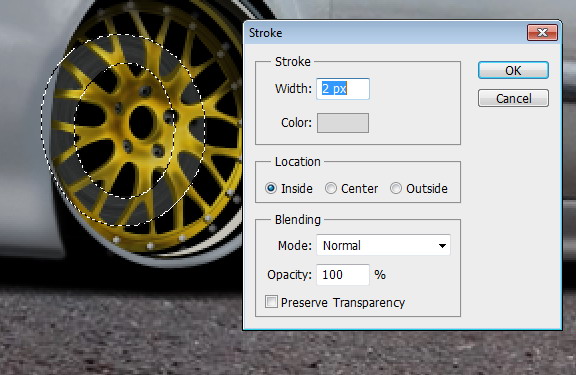
In Layers panel, Command/Ctrl-click disc layer thumbnail to create a new selection based on its shape. Create new layer on top of the disc brake. Right click and choose Stroke. Set Width: 2 px, Color: Gray, Location: Inside.
Step 57
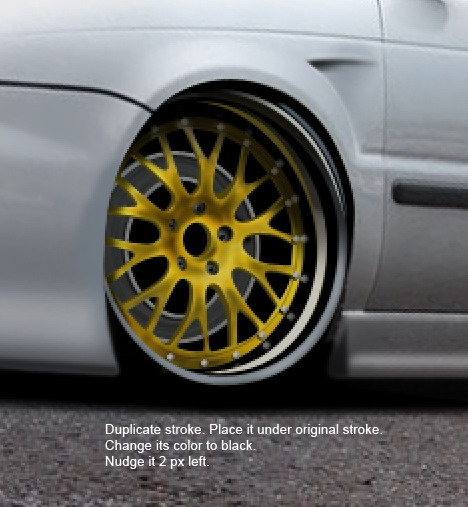
Hit Command/Ctrl + J to duplicate the stroke layer. Place it under original stroke layer. Hit D to change foreground color to black. Hit Shift + Alt + Del to fill the layer with black. Activate move tool then press left arrow twice to nudge layer 2 px left. This layer will act as disc brake shadow.
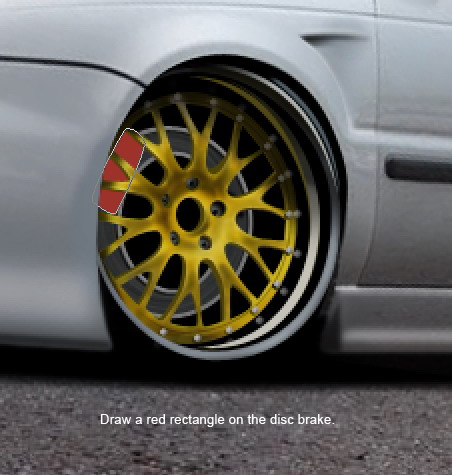
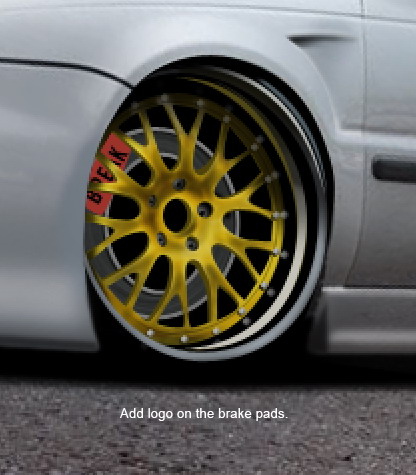
Step 58
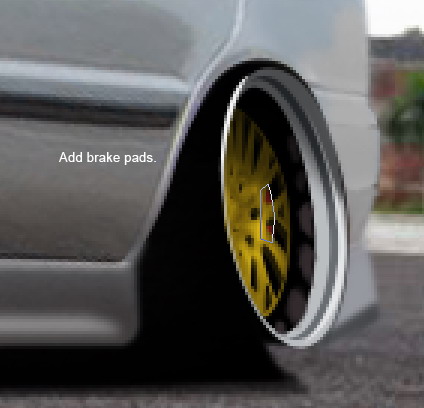
Draw a red rectangle on top of the disc brake. This simple shape will be the brake pads. Add logo on the brake pads.
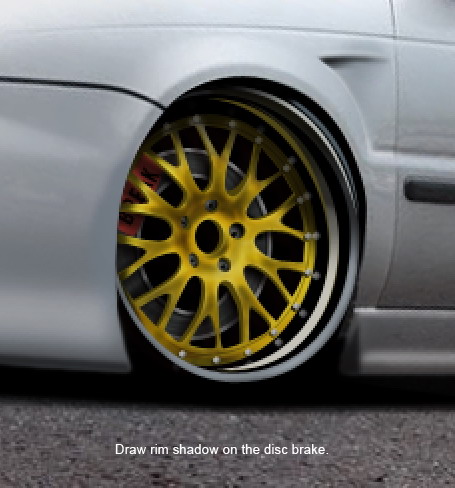
Step 59
Set foreground color to black. Use brush tool to manually draw spokes and rim shadows on the disc brake.
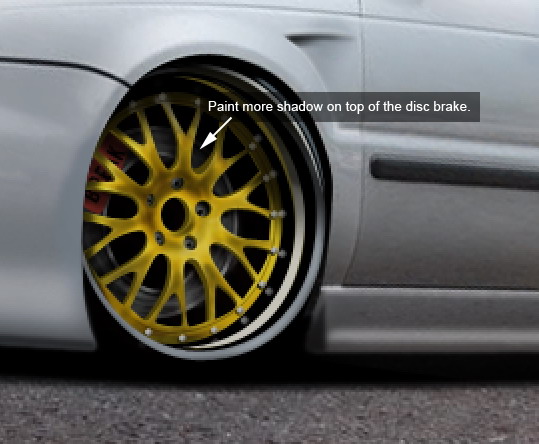
Step 60
Paint more shadow on top of the disc brake.
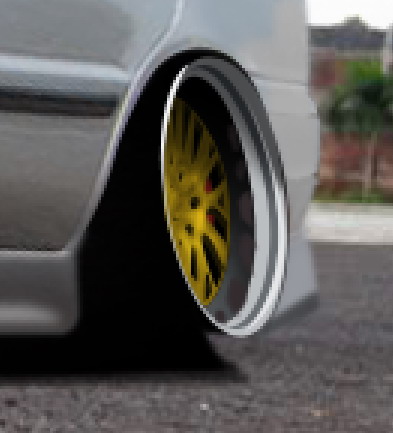
Step 61
Below is finished rim on 100% magnification.
Step 62
Let’s start working on its rear rim. Start drawing its spokes. Make sure to match it with tire perspective.
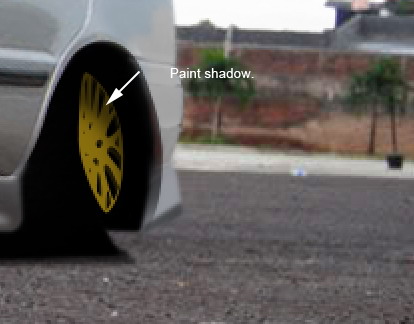
Step 63
Paint shadow on upper part of the spokes.
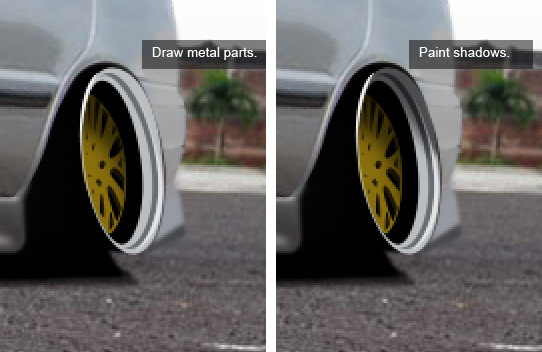
Step 64
Use pen tool to draw metal parts of the rim. Create new layer and paint some shadow on top of the shape.
Step 65
Use color picker tool to sample spokes color and then bring down its brightness. Draw spokes reflection on metal part.
Step 66
Make sure spokes layer is active. In Layers panel, Alt-click new layer icon. Activate Use Previous Layer, set blend mode to Overlay, and select Fill with Overlay-neutral color.
Step 67
Paint spokes with dodge tool to lighten it and burn tool to darken it.
Step 68
Draw brake pads behind the spokes.
Step 69
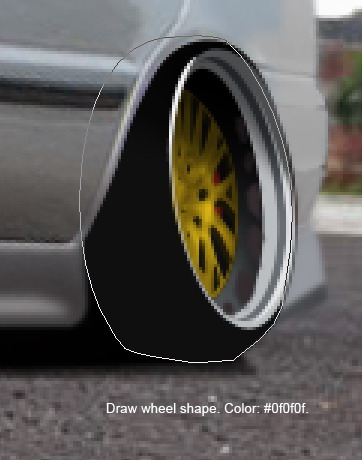
Use pen tool to draw a black shape behind the rim for its tire.
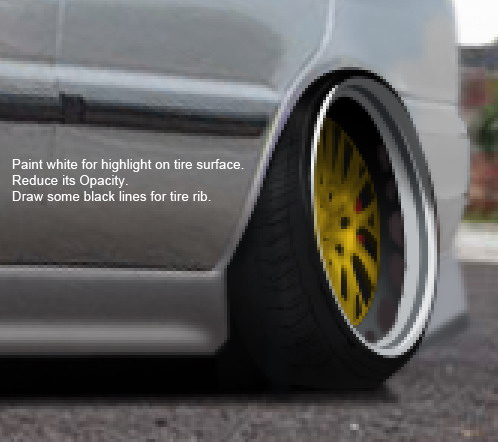
Step 70
Paint a bit of white highlight on tire surface. Reduce its Opacity. Set brush size to 1 px and paint black line for tire rib.
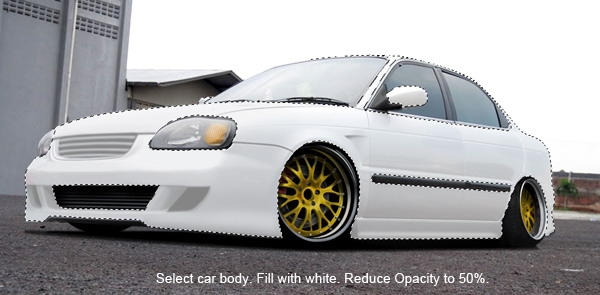
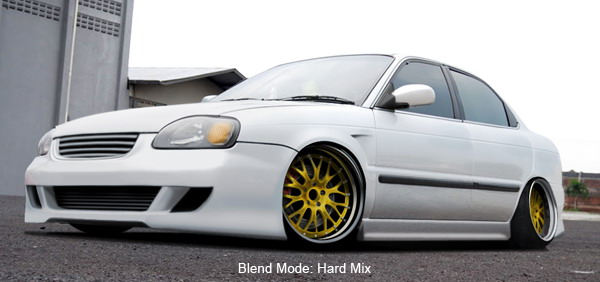
Step 71: Lighten Car Color
Let’s lighten the color of this car. Create new layer and place it on top of all layers. Select car body and fill it with white. Reduce layer Opacity to 50%.
Step 72
Change blend mode layer to Hard Mix.
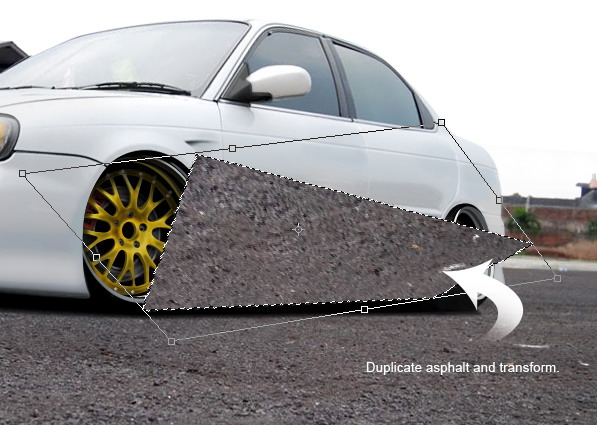
Step 73: Add Asphalt Reflection
Let’s add asphalt reflection on the body to make it appears more realistic. Use polygon tool select asphalt near the car. Hit Command/Ctrl + J to duplicate it to new layer. Move it on top of all layers. Transform it until it fits on the car body.
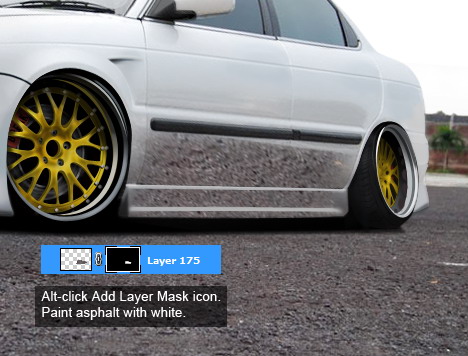
Step 74
Alt-click Add Layer Mask icon to hide every pixel on the layer. Select brush tool and set its hardness to 0%. Paint white to reveal asphalt reflection on the car.
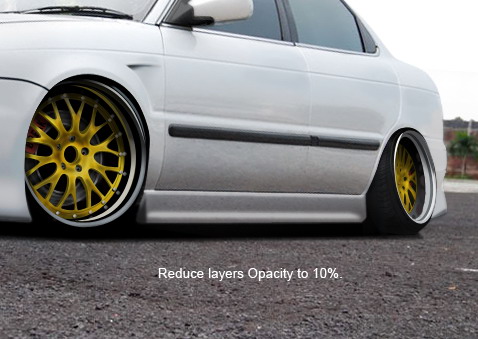
Step 75
Reduce layer’s Opacity to 10%.
Step 76
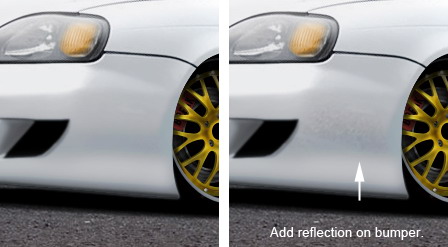
Repeat previous steps to add another reflection on front and rear bumper.
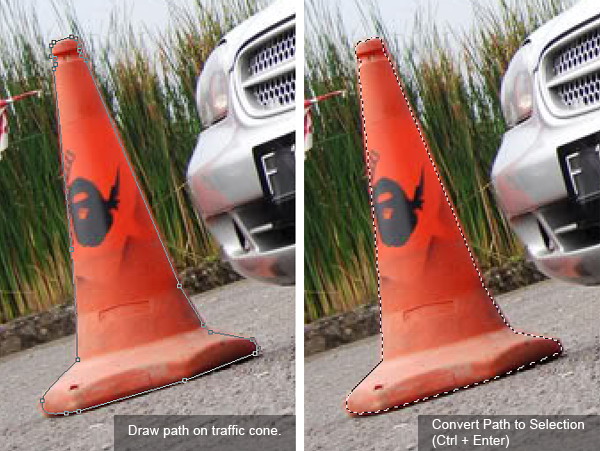
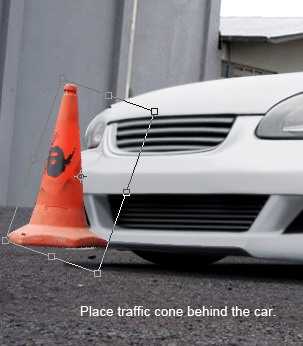
Step 77: Add Traffic Cone
Open original
car photo. Create new path selecting the traffic cone. Convert path to selection.
Step 78
Use move tool to drag traffic cone to our modified car. Place it behind the car. Paint black under the traffic cone to add some shadows.
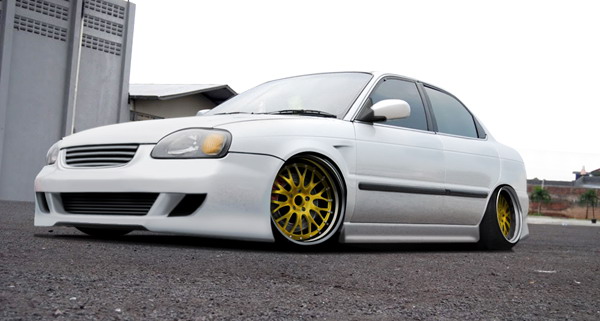
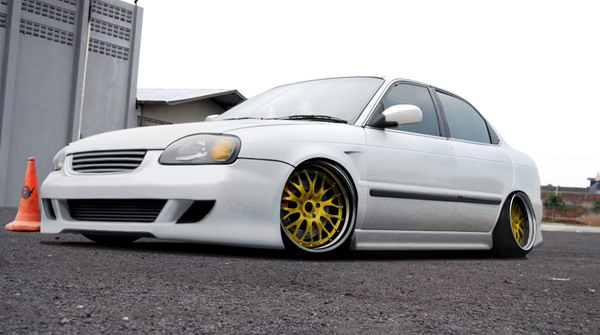
Final Image
For the final touch, I added a small logo on the wall. As you can see, the process of customizing this car was very simple. What you need is the brush tool and attention to detail. I hope you enjoyed this tutorial. Now, it’s time for you to customize your own car!


